


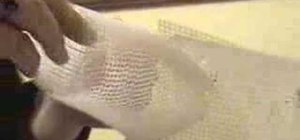
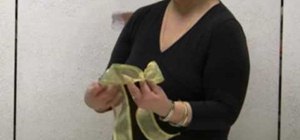
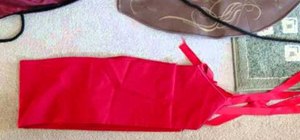
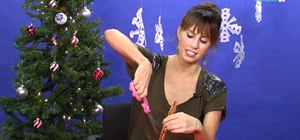
What a unique bow. Your gifts will be beautiful under the Christmas tree. Materials you will need are: plastic wrap, hot glue, LEDs, scissors, pliers duct tape, glue gun and glue, toothpicks and 3 volt batteries. First you take the plastic wrap and cut it about 5 times the size your bow is going to be. Take the end and push it together. Now make one side of the bow, push together, and make the other side of the bow. Keep going back and forth until the plastic wrap is at the end. The left over plastic wrap is wrapped around the center of the bow and tucked underneath. Reach in between the layers and puff it up. Take your glue gun and cover the plastic wrap bow with hot glue. It is best to go back and forth when applying. Do both side of the bow to make it sturdy. Decorate your bow before making and putting on the lights. Take one battery and 2 LEDs . Be sure you put the plus' together so they will light. Hold the LEDs on each side of the battery and take your pliers and very carefully move one side of the LED slightly upward. Plus side should face down. Do on both LED's. Now tape down LEDs to the battery with duct tape. Do on both sides and push down hard so lights will stay on. Make two holes in the bow and put one light in one hole and the other light in the second hole. Beautiful, all done and your package will be very unique.
Just updated your iPhone? You'll find new emoji, enhanced security, podcast transcripts, Apple Cash virtual numbers, and other useful features. There are even new additions hidden within Safari. Find out what's new and changed on your iPhone with the iOS 17.4 update.


Be the First to Comment
Share Your Thoughts